18 Nov 2011

Ffefrynau Friday { 18.11.11 }

1. Teeny tiny seam tutorial 2. Old silverware napkin rings 3. Gingham flowers
4. Elf stockings 5. Pretty pot holders 6. Great eye make-up
7. Fabric covered suitcases 8. Pretty picture 9. Embroidered Christmas ornament

I need more Christmas ideas, does anyone know of any on Pinterest that I've missed?


  •  I discovered Clare's blog, A ZigZag Path, from a comment she left. Leave me links to your blogs so I can take a looksie, I love finding new reads! 
  •  Speaking of new blogs, I also discovered Lola Nova this week
  •  Looking for interior ideas on how to use vintage pieces to bring interest to your home? Check out The Vintage Inspired Home, mucho pretty pictures to drool over!
  •  Want a great tutorial on how to edit your pin-up style photos? Click here
  •  For my last day at the BBC, Dave-the-Editor baked a peanut butter chocolate brownies version of this recipe and they were a little taste of heaven

I'm having a mini blogger meet-up with Lauren of Tea and Crumpets tomorrow. We were both a bit rubbish at photo snapping our day last time we met, here's hoping we're a little more snap happy this time!

    Thanks for stopping by,

    16 Nov 2011

    How Do You Use Pinterest? { Notes }

    I wanted to do a brief follow-up to my How Do You Use Pinterest post a couple of weeks back because I found how everyone uses it really interesting. 


    I'm very good at remembering things I've seen but find that the title of a page isn't going to stick in my memory, so a visual bookmarking system is perfect for me. I'm also slightly compulsive (I've mentioned this before) but I like to be able to return to something whenever I think about it to check something, review it or just see if there's anything else popping out at me that didn't before.

    Because of this I find it very interesting that Rachelle deletes her pins once she's acted on them and feels she won't need them again (she cited pins for a cat door and cellphone as examples). I'm assuming this means she's essentially pinning a shopping list, is that right Rachelle? I haven't yet explored using pinterest in that way, mostly because by the time I have the cash to buy the thing I've pinned it'll no longer be available, but I can see the appeal. I'm just not sure I could delete the pins once I'm done with them!

    Most of you seem to use it to bookmark and for inspiration. I still can't believe that Charly hasn't given in to peer pressure and that Popbabe's work ban it as social networking! I love that Kristin pins things that are just because she loves them and she populates her fantasy house with them. I'm also incredibly impressed with her restraint, I can't keep away from pinterest and yet Kristin only checks a couple of times a week! I've managed to get almost my entire office hooked and am working on the rest of the BBC.

    Thanks for stopping by,

    14 Nov 2011

    Project: Dresser { Notes }

    I thought I'd talk about the choices I made, the inspiration behind them and the tutorial I used that resulted in my favourite piece of furniture in my house (to date anyway).

    The original plan for the alcoves on both sides of the dining room fireplace had been to put in shelves, because that's what normally goes in alcoves, right? I'm a big fan of different sized shelves, I like having books and curiosities displayed for all to see, possibly because it reminds me of those little magical book stores with all their nooks and crannies. I'd pinned some inspirational pictures as per normal:

    { Source: Flikr }

    { Source: Pinterest }

    That plan had been in place several months now, I'd even talked over building them myself with my Mum, and how we'd construct them. It stayed my plan right up until I visited some friends in the village who moved here around the same time as me and are also doing up their own house. They'd bought a lovely pine dresser from eBay for their dining room. I love dressers, I'd just not thought about getting one as it didn't fit in with my idea of what storage I was after. After seeing theirs I completely changed my mind!

    As it turned out, I had pinned a couple of pictures of dressers to my house inspiration board. The second was my direct inspiration for the style and colour of my dresser.

    { Source: Sally's Zuhause }
    { A Tapestry of Dreams }

    I toyed with the idea of keeping the table top part natural wood to match my dining table but as it turned out it had been stained far darker and would have looked wrong.

    I was very clear that this was going to be my sewing cupboard, everything crafty was going to be stored in the one place. I also loved the blues and greens that shabby chic seems to be predominantly painted in.

    1. Cupboards 2. Door 3. Door
    4. Mirror 5. Shelves 6. Crate
    7. Cupboard 8. Cupboard & Shelves 9. Drawers

    Picture #7 was a direct inspiration for the way that I wanted to shabby up the paint. I love the white and blue, and I did toy with painting the entire thing blue but I plan on painting the double doors to the lounge a light blue and felt that it would be too much to have another large piece of furniture the same or similar colour, and I do love white furniture. The corner the dresser's in doesn't catch an awful lot of sunlight, despite its placement right next to a huge window. The back faces north and between the mountains on either side and the house next door my little dresser's corner doesn't get very much sun, it made photographing it very difficult! Painting it white brings a little more much needed brightness to that corner of the room.

    I'd found a couple of tutorials on painting, pinned to pinterest of course! I loved the idea of pulling a colour through under the white and this tutorial offered just that.

    { Source: Brassy Apple }

    I didn't have any solid soap, so I borrowed the idea of a candle from this tutorial and it worked perfectly. I got a bit carried away and in a couple of places used the candle on the blue undercoat where I shouldn't have because I wanted blue and not wood, but live and learn!

    The end result is some great flashes of blue, not really noticeable but visible when you look.


    The ceramic striped handles were another eBay purchase and cost ... well, rather a lot actually, but are totally worth it! Aren't they great?


    The only real issue I came across (other than tired arms from all the damned painting) was the very large gaps above the doors on the bottom cupboard that hadn't really been noticeable when the wood was dark. As you can see, the white paint made it very noticeable!


    Luckily it was easily fixable and for less than £1! Usually, where drawers are built in to cupboards there are strips of wood running horizontally along the underside of the drawer to prevent just this sort of problem. In this case no such strip existed. In the picture below you can see the support for the drawer on the left, basically the drawer runner, but no wood under the drawer itself along the front as you'd expect.


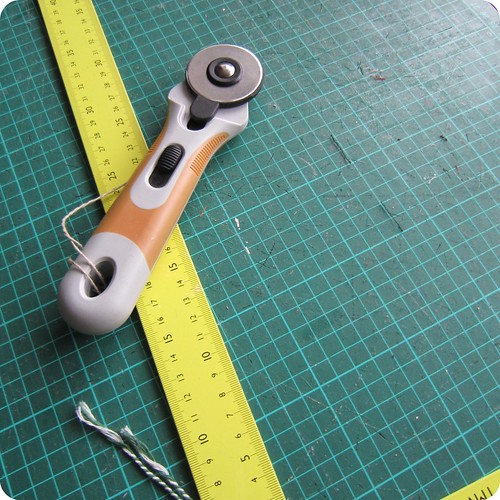
    So I nipped to my local B&Q and picked up a small piece of trim for around 79p, measured and cut it to almost the right size (I used a saw and didn't cut anything vital, yay left-handed me!). I then painted it, sanded the edges and got this:


    Which I then wedged in place:


    Ta da! Instant hole filler! See:


    Have you painted your own furniture? Have you any tips? I've got several more pieces in mind to purchase that are all going to need to be re-vamped, any advice would be greatly appreciated!

    Thanks for stopping by,

    12 Nov 2011

    Project: Dresser

    Firstly I just wanted to say a massive thank you to Sarah, Suzy and Sølvi (ooh, I alliterated and didn't even realise it!) for stepping in with guest posts at incredibly short notice whilst I was away. I don't know about you but I loved every one of them. Thank you girls, I couldn't have asked for better posts!


    So recently I took a road trip to pick up a dresser I'd bought with my friend, Scott, who came along as the muscle. The dresser was another one of my bargains off eBay, scored for £50. It wasn't until I'd painted it, re-attached the doors and added my new door knobs that I realised just why it was only fifty quid.

    The dresser was advertised looking like this:


    Blurry certainly didn't do it justice, neither did the over-crowded room it was stored in. Scottie and I heaved my new dresser over a bed and around a drum kit, past the piles of boxes and out to my Mum's RAV4 borrowed specially for the occasion (via Bridgend and a cup of tea with cake). Thankfully, it fit.

    Driving very slowly, paranoid I was going to break the glass doors, I edged my way back home where Scott and I heaved it up the front steps, past the new-to-me eBayed front door (I don't think I've told you much about that yet) and past the dining room table to it's fireplace alcove. It was the perfect size.

    My new-to-me dresser in its new-to-it home

    Knowing my flash-in-the-pan attention span, I immediately took all the doors off, took down the top piece and began painting it. Two weeks later I finally finished painting it, I knew if I stopped it would just sit there half done forever but it was a mammoth effort in self-control just to get to the finish line. Here's the end result:


    I discovered, when I put the doors back on, that everything was a little warped. Gaps around the bottom cupboard doors were hidden by the darkness of the wood, and highlighted once painted white. The glass doors also fit strangely and don't close properly. The holes for the handles have been drilled unevenly and the drawers are too thick for my new handles to fit through. It's a crude dresser, made from sub-standard pine that stank of cigarette smoke. And I love it ... well, apart from the smell.

    I've shabbied up the paint work, exposing the blue undercoat I gave certain areas. I still need to finish dressing it, I have some mini-bunting planned and I'm going to paint the wooden box green, but overall I'm very very pleased with the result.

    The glass cupboard holds all my patterns and my button jars, miscellaneous bits and pieces, and elastics. The drawers hold all my sewing paraphernalia that I don't want on display and the cupboards hold ... stuff. Deciding just what to put in it took a whole weekend, after three years of no storage in my dining room I was suddenly indecisive over just what I wanted to put away!

    All in all, definitely worth the effort. Still, I hope it's a long time before I have to paint any furniture again!

    Thanks for stopping by,

    11 Nov 2011

    Lest We Forget

    Source
    Please support the British Legion in their on-going work to help soldiers and soldiers families. Please remember the sacrifices given by people from long ago and those still making those sacrifices, regardless of whether you agree with the conflict. Please don't ever forget all those who've died in violence to protect others. Please wear your poppy with pride.

    Thanks for stopping by,

    9 Nov 2011

    Guest Post: My Favorite Sewing Tools!

    Hi people! My name is Sølvi and I blog at delfinelise, and I am thrilled to help Tors out this week!

    Hi! I´m Sølvi

    Nice to meet you!

    My initial thought was to write something about dressing stylish for winter, but since that topic already´s so well documented by Sarah and Suzy, I decided to share with you some of my favorite sewing tools!

    I am always interested in new ways of improving my sewing skills, and I am always on the lookout for new cool stuff that can make my sewing experience even better. How about you? Do you have any special tricks or gadgets that makes your sewing more enjoyable?

    Well, here it is, my top list:

    1. Measuring tools. The classic Sømometer is a typical Scandinavian gadget, and as you can see from the picture, all the most important measurements are printed on it. Invaluable! My measuring tape is pretty sweet too, as it has one side with inches and one with centimeters, and it is printed for lefties! I am left-handed, and it´s so cool to have a measuring tape where the numbers start at the right side, much easier!

    My favorite tools

    2. The second thing I´ll share is my sketching tools. I have a fashionary, witch is a sketching book with body templates. I sketch my design ideas in it, so I don´t forget, and I can always go back and see what I have actually made, and what I haven´t . I always color my sketches using my Caran d´Ache pencils. I've had them for ages (I am talking 20+ years here...), and they are so perfect for coloring!


    fashionary drawings 

    3. The next things that are invaluable to me are my sewing books. As I use A LOT of BurdaStyle Magazine patterns when I sew, having a good reference book nearby is crucial, as the Burda descriptions tends to be quite foggy. A good fitting book is important as well, so I know I don´t spend hours on a garment only to find that it doesn´t fit. 

    My favorite tools

    4. For prepping patterns and transfering them onto the fabric I love to use my Signet Color chalk. It´s got cartridges in different colors, and it works well on many different types of fabric. I love that it has the shape of a pen as well, as it makes it more pleasant to write with than some of the other tools on the market. Pictured is a hand held hole punch as well. It´s perfect for punching holes in the paper pattern so that I can makes accurate markings on the fabric.

    My favorite tools

    5. Next up are my favorite cutting tools. I depend heavily on my rotary cutter and cutting mat, it makes fabric cutting much more accurate and fast. I love my metal ruler as well, it´s super long, and with a 90 degree angle it´s perfect for cutting straight lines.

    My favorite tools

    6. The last thing I would like to share with you is my favorite way of storing pins while sewing. It´s a belt for the sewing machine! I don´t have a big sewing space, so I love how this keeps (most of) my pins, sewing machine needles and needles in place. I found the tutorial for this on Martha Stewart.

    My favorite tools

    So there you have it, my favorite sewing tools. Enjoy!

    8 Nov 2011

    Guest Post: Autumn Fashion in 1954

    Hello, I'm Suzy from Suzy Sewing. A few weeks ago Tors had a wonderful post about Winter Style and one of her considerations was that she is often too cold to wear the stylish and gorgeous outfits from where she gets inspiration. I totally understand her and in keeping with the spirit decided to share with you some scans of what was in fashion  this time of the year back in 1954. I am seriously developing a hoarding/ collection issue with vintage magazines, so happy to share some gorgeous images with you. Hope you enjoy!


    The tide was changing and some more box shaped fashions were starting to emerge.


    Yet the well known shape of the 50s New Look is still strong. I absolutely love this day to evening look. And she's wearing flats! How comfortable is that.


    Many of the designs focus on the use of woollens for dresses. Illustrations focus on textures and colours. Very autumn, don't you think?


    And finally I will leave you with the below scan, entitled Flatter your Figure. I am a firm believer that if you dress for your figure and know how to accentuate good bits and disguise not so good bits, you will be able to pull off any era of fashion.


    7 Nov 2011

    Guest Post: The Marriage of Style and Season

    Hello, everyone! My name is Sarah and I blog at Rhinestones and Telephones. I'm delighted to be a guest blogger at Tors' online home whilst she is off in the wilds of Wales.


    Tors is a terrifically crafty and clever lady and I always look forward to her posts. Recently, she talked about her difficulties in meshing her style with the practical aspects of a Welsh winter. In her own words:

    "...try dressing stylishly whilst wearing SWAT boots and the warmest coat you have (and thermals, and woolly hat, and crazy hair). I defy anyone to wear make-up whilst standing at the back of the Brecon Beacons in pouring rain and driving wind in a jacket made for a twelve year old (read: slightly too short in the arms and with a hood that doesn't quite cover your large adult head)."

    Stylish Debi from My Happy Sewing Place and The Sew Weekly looking chic and cozy in her handmade cape!

    As a Canadian, and a dedicated wearer of skirts and dresses in all weather, I am completely empathetic to Tors' dilemma and detest the SWAT Team look. In my wardrobe, the advent of winter does not mean I put away my personal look and dress like a completely different person for the next 8 months. What Tors and many of us are looking for, is a wardrobe full of versatile and practical garments that meet the needs of the season, yet don't sacrifice style or make our bank accounts scream in agony.

    Taking a peek at Tors' Pinterest shows a woman of excellent style and taste with a penchant for vintage and vintage-inspired clothing. In her Trousers & Shorts pinboard, you can see she loves high-waisted, classically styled trousers. With her slender figure, I think she would look absolutely fantastic in classic 1940's style side button trousers: warm and stylish!


    Gorgeous, no? I have a pair of Heyday trousers and they are great. They take a lot of abuse (Play Doh, anyone?) and come out of the wash like new! I'm sure crafty Tors could easily whip herself up a pair from EvaDress 3322. I'm planning on making a pair in dark denim and another in charcoal corduroy.


    Given that Chez Tors is on the side of a mountain facing a valley, freezing winds and the like are the norm. I sympathize. I live near the lake where the wonderful phenomenon of 'lake effect snow' and 'cold vs. warm fronts' are played out in Olympic proportions all season long. My solution? A long, fully lined winter coat that either zips or button from collar to calves. Paired with waterproof, lined, knee-length winter boots I am very toasty warm in my skirts and dresses. I found my full-length red wool coat for $10 last year in my local thrift store. Score!


    Expert layering is also essential. By this, I mean layers that are warm but can easily be removed once indoors. There's nothing worse than being all kitted up for the cold outdoors only to swelter in your central-heating-set-to-equator-hot office. Layering - it's a lifesaver.

    Source: etsy.com via Tors on Pinteres

    Wouldn't Tors look terrific in this dress? Layered with warm tights, boots, and a fuzzy cardigan (a vintage beaded one, methinks), she would be toasty battling the elements on her way to work, yet still comfortable in her tropically heated office. I can also see her looking fabulous in Colette Patterns' Peony.


    When one lives in a cold climate, the fabric of choice for warm winter garments tends to be wool....unless you're allergic, like Tors and I. *humph* While many would suggest lining the garments as a solution, but sometimes those itchies still seem to find a way to sneak though and drive me nuts! Solution? Warm, comfortable, durable, and easy care fabrics like corduroy, twill, and heavy jersey (cotton, bamboo, etc). I also try to use warm fabrics in unusual ways such as a Jasmine blouse sewn from flannel. Cozy and chic!

    Refashionista Queen Zoe of So, Zo and her refashioned sweatshirt. Beautiful!

    So there you have it! My solution for marrying your style with the season: a combination of warm and cozy handmade and purchased pieces, peppered by the occasional purchase of an investment piece. Bring on winter!

    * * * * *

    These ladies have chilly chic down to a fine art:
    Diary of a Vintage Girl
    Tea and Crumpets
    The Freelancer's Fashion Blog
    Twila Jean
    Vixen Vintage

    Popular Posts